An updated version of this post can be found here:
Installing ELK 7 (Elasticsearch, Logstash and Kibana) – Windows Server 2016
What is an ELK stack and why would you want one in your environment?
Elasticsearch, Logstash and Kibana (ELK) is the combination of 3 separate pieces of software from the same vendor, Elastic. The basic idea is that we will use Logstash to collect/parse/enrich our logs to be searched/analyzed using Elasticsearch. All of this information is easily accessed and visualized via Kibana which serves as the web based front end.
In my case I was looking for a free alternative to Splunk, which is fantastic but has some frustrating licensing limitations. I found that with around 10 lab VMs forwarding logs to the Splunk instance that I quickly went over the trial limit. Once the license limit is met for the day, it shuts off and can’t be used. Fed up with these limitations, I started looking into the ELK stack and I can honestly say I was not disappointed. The installation is a little bit trickier than Splunks but can easily be scripted once you are familiar with the packages and how they are installed.
So in this post I will demonstrating how to setup a basic ELK stack and start gathering logs from the Windows VM that ELK is running on. It is important to note that you do not want to expose this server to the internet for a few reasons but the most important being that there is no authentication on Kibanas interface.
My lab setup
For this lab I’ll be using a Windows 2012 R2 VM with 4 vCPUs, 4 Gb RAM and 50 Gb of HD space. The OS is just a base install of Server 2012 R2 Standard with all the latest updates and the Windows Firewall has been turned off.
You don’t need a huge server for this deployment but these applications can be a bit memory hungry and the faster the disk you can put this on the better. CPU usage varies but tends to be on the lighter side, you will see some spikes as new clients are brought on and mass logs are indexed on the way in.
I will be using the following software versions in this lab:
Elasticsearch 2.3.2
Logstash 2.3.2
Kibana 4.5.0
Filebeat 1.2.2
Packetbeat 1.2.2
Topbeat 1.2.2
Winlogbeat 1.2.2
NSSM 2.24
Java JDK 8u92 x64
WinPcap 4.1.3
Installs Needed on the ELK Server:
- Elasticsearch (https://www.elastic.co/downloads)
- Logstash (https://www.elastic.co/downloads)
- Kibana (https://www.elastic.co/downloads)
- The Non-Sucking Service Manager (NSSM) (https://nssm.cc)
- Java (https://www.java.com/)
- WinPcap (https://www.winpcap.org/)
Log Shippers/Agents for clients:
- Filebeat (https://www.elastic.co/downloads)
- Packetbeat (https://www.elastic.co/downloads)
- Topbeat (https://www.elastic.co/downloads)
- Winlogbeat (https://www.elastic.co/downloads)
Preparing the server for the ELK install
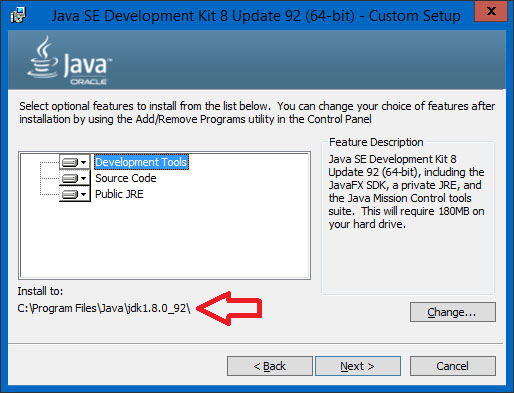
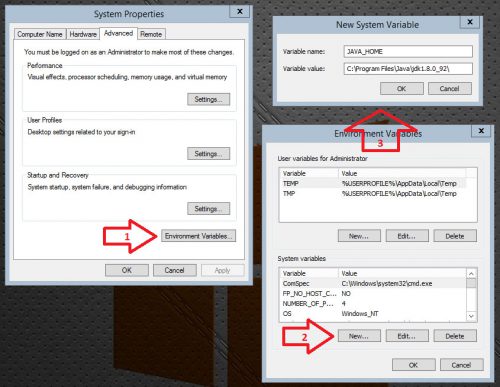
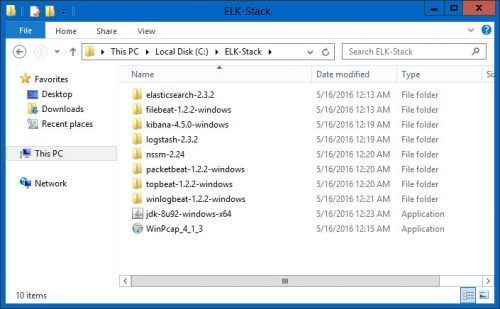
The first thing we need to do on the server that we will be installing the ELK stack on is install the latest version of the Java JDK and create the JAVA_HOME system variable. I also recommend unzipping all of the packages (including the beats agents) to a common local directory that will be home for the installs – ex c:\ELK-Stack\.
- Install the Java JDK, noting the install directory (ex c:\Program Files\Java\jdk1.8.0_XX).
- Create a system variable named JAVA_HOME with a value of the path from the Java install.
- Unzip all of the downloaded packages to a common directory (ex c:\ELK-Stack).
Installing Elasticsearch
To install Elasticsearch open a powershell prompt and type the following commands:
- Install Elasticsearch as Windows Service.
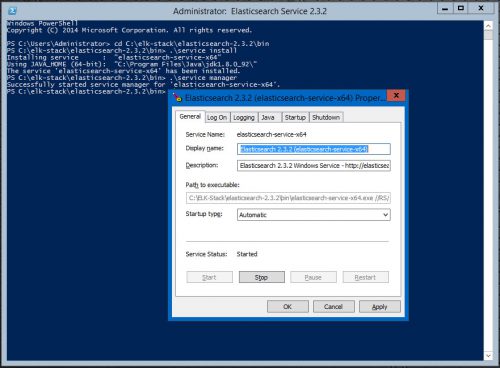
Invoke-Expression -command “c:\ELK-Stack\elasticsearch\bin\service install”You should see something similar returned:
Installing service : “elasticsearch-service-x64”
Using JAVA_HOME (64-bit): “C:\Program Files\Java\jdk1.8.0_92\”
The service ‘elasticsearch-service-x64’ has been installed.
- Open the Elasticsearch service properties.
Invoke-Expression -command “c:\ELK-Stack\elasticsearch\bin\service manager” - The properties window should pop up for the Elasticsearch service, change the Startup type to Auto and start the service.
Note: The memory settings for the JVM can be adjusted on the Java tab, this setting will likely need to be adjusted later as you start ingesting more data.
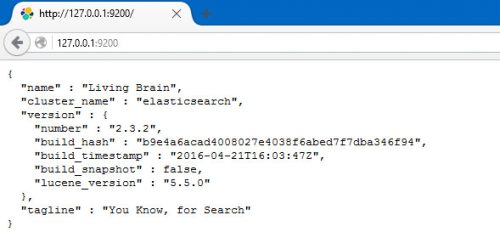
- Verify the Elasticsearch is now running by opening a browser and going to http://127.0.0.1:9200 – you should see something similar to the following:
Installing Logstash
When installing Logstash you will need to create a logstash.json configuration file in the uncompressed logstash\bin directory (ex c:\ELK-Stack\logstash\bin\). You can download a basic configuration file below here or use the following powershell command to save it directly to your logstash directory:
Start-BitsTransfer -Source /data/ELK-Stack/Config-Files/logstash.json -Destination c:\ELK-Stack\logstash\bin\
Now to install Logstash, we will use the Non-Sucking Service Manager to install it as a Windows Service so it starts automatically and we can tie it to some dependencies like the Elasticsearch Service.
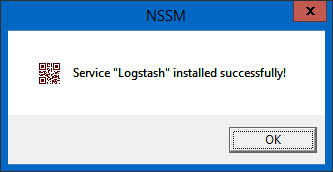
- Open a powershell prompt and use the following command to create the Logstash service using NSSM:
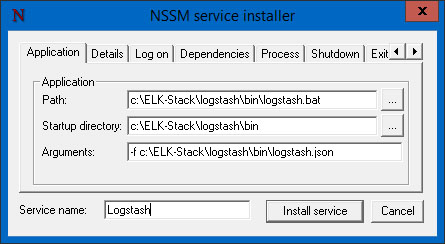
Invoke-Expression –command “C:\ELK-Stack\nssm\win64\nssm install Logstash” - In the GUI, set the following settings on the Application tab:
Path: c:\ELK-Stack\logstash\bin\logstash.bat
Startup directory: c:\ELK-Stack\logstash\bin
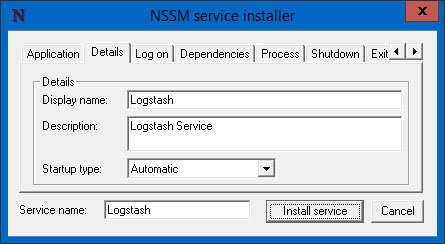
Arguments: -f c:\ELK-Stack\logstash\bin\logstash.json - On the Details tab, set the following:
Display name: Logstash
Description: Logstash Service
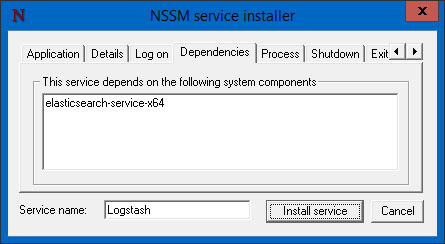
Startup type: Automatic - On the Dependencies tab, set the following:
elasticsearch-service-x64 - Click Install service and then Ok to complete the install.
- Install the Logstash Beats plugin:
Invoke-Expression –command “c:\ELK-Stack\logstash\bin\logstash-plugin install logstash-input-beats”
Installing Kibana
- Open a powershell prompt and use the following command to create the Kibana service using NSSM:
Invoke-Expression –command “C:\ELK-Stack\nssm\win64\nssm install Kibana” - In the GUI, set the following settings on the Application tab:
Path: c:\ELK-Stack\kibana\bin\kibana.bat
Startup directory: c:\ELK-Stack\kibana\bin - On the Details tab, set the following:
Display name: Kibana
Description: Kibana Service
Startup type: Automatic - On the Dependencies tab, set the following:
elasticsearch-service-x64
Logstash - Click Install service and then Ok to complete the install.
- Open services.msc and verify the following services are started:
Elasticsearch
Logstash
Kibana - Open a browser and go to http://localhost:5601 – you should then see Kibana load for the first time:
The ELK Stack itself is now fully configured but we need to start sending data to it…
Installing Beats on the ELK Server
Beats are the “data shippers” or agents that are deployed on clients that you would like to collect data and logs from so that it can be indexed and analyzed via the ELK Stack.
- Packetbeat – Gathers network related information (requires WinPcap to be installed)
- Topbeat – Gathers infrastructure metrics like CPU, Memory, Process and other related info
- Filebeat – Gathers and forwards log files
- Winlogbeat – Gathers and enriches Windows event logs
- To install the beats agents, use the following commands at a powershell prompt to run the install scripts located in the unzipped package directories:
PowerShell.exe -ExecutionPolicy UnRestricted -File C:\ELK-Stack\filebeat\.\install-service-filebeat.ps1
PowerShell.exe -ExecutionPolicy UnRestricted -File C:\ELK-Stack\topbeat\.\install-service-topbeat.ps1
PowerShell.exe -ExecutionPolicy UnRestricted -File C:\ELK-Stack\packetbeat\.\install-service-packetbeat.ps1
PowerShell.exe -ExecutionPolicy UnRestricted -File C:\ELK-Stack\winlogbeat\.\install-service-winlogbeat.ps1
- Make sure to verify the following services are started in the services.msc console:
filebeat
packetbeat
topbeat
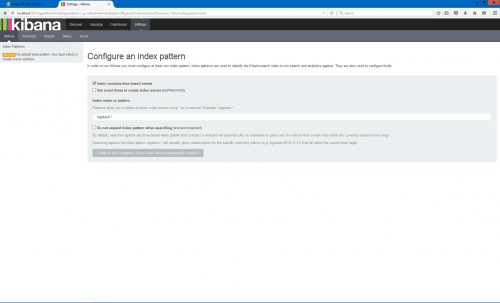
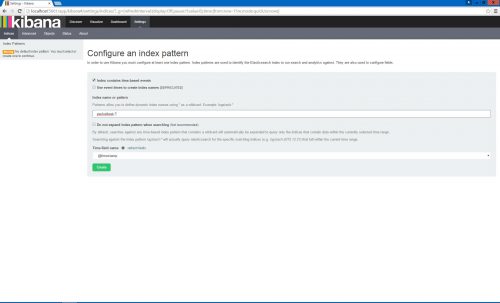
winlogbeat - Now go back into Kibana under Settings > Indices and configure the following in the “Index name or pattern” field:
filebeat-*
packetbeat-*
topbeat-*
winlogbeat-*Note: You won’t be able to add the index until some data has been sent to be indexed. Filebeat for example won’t work unless you have pointed it to some log files like IIS or Apache logs via filebeat.yml configuration file.
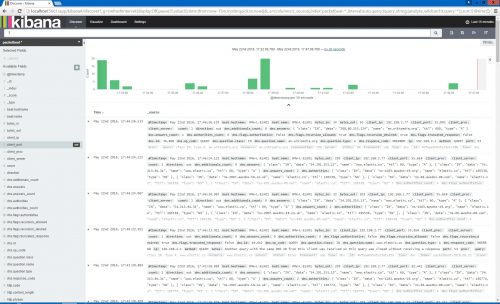
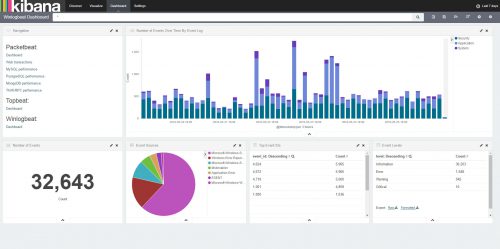
- Now click on the Discover button in Kibanas interface and you should see that data is now flowing in!
Powershell cheat sheet/install script
You can find the powershell install/cheat sheet script that I used in the video at the link below, just rename it to .ps1 prior to running it:
ELK-Install-Script.txt
This “script” is super basic and is really just all of the needed commands in order, commented out with the settings and any steps that need to be completed. It’s not meant to be anything fancy but does make quick work of the install. The script assumes all packages have been unzipped to c:\ELK-Stack.

