In this post I am going to cover the steps needed to install and configure Ubuntu 16.04 Desktop as the base operating system for what is going to become the ELK Stack server. My intention with this first post is to help people running the ELK services on top of Windows be a little more confident about switching over to Linux.
I will be covering the following items in this post:
- Installing Ubuntu 16.04
- Configuring a Static IP
- Installing and configuring SSH
- Updating the OS
If you are already comfortable with these basic Linux items, you may want to skip ahead to Pt. 2 – Installing and configuring Elasticsearch, Logstash, Kibana & Nginx. The only thing that is actually required before proceeding to the next part is a machine running Ubuntu 16.04 with a static IP (the IP will be tied to the configuration).
Installing Ubuntu
1.) Power on the machine and boot from the ISO Image downloaded from https://www.ubuntu.com/download.
2.) Select your language and then click Install Ubuntu.

3.) Select “Download updates while installing Ubuntu” and Continue.

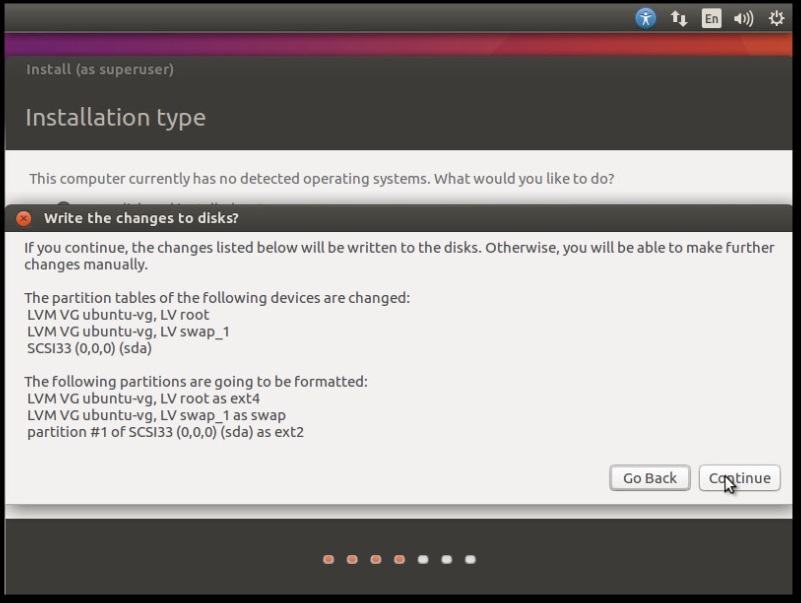
4.) Select the Installation type:
– Erase disk and install Ubuntu
– Check “Use LVM with the new Ubuntu installation”
– Click Install Now
– Click Continue to confirm the changes to the disk

5.) Select the time zone and click Continue.

6.) Select the Keyboard layout and click Continue.

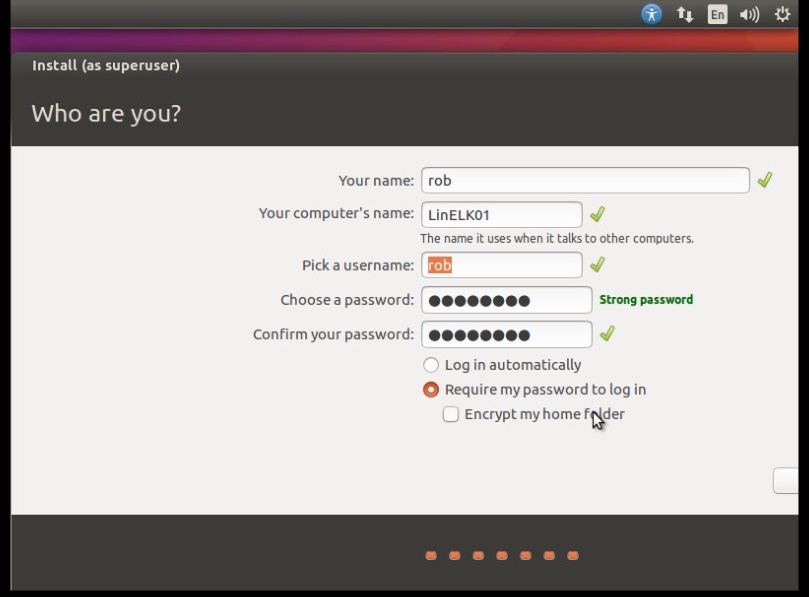
7.) Select a Username, Password and Computer Name.
8.) Wait for the install to complete.

9.) Restart to complete the install.

Configuring the Network, SSH Access and updating Ubuntu
1.) Open up a terminal and enter the following command to edit the network interfaces configuration file:
rob@LinELK01:~$ sudo nano /etc/network/interfaces
2.) Add/edit the following to set a static IP for the primary NIC interface:
auto ens160
iface ens160 inet static
address 192.168.2.85
netmask 255.255.255.0
gateway 192.168.2.1
dns-nameservers 8.8.4.4 8.8.8.8
The interface name will need to be changed to match the interface that is on the machine being used, in this case my VMware VMXNet3 adapter is seen as ens160. The address, netmask, gateway and dns-nameservers will also need to be adjusted to match up with the local network settings where the ELK server is going to be running.
3.) Restart the server and once it is back up, verify the IP address took:
rob@LinELK01:~$ sudo systemctl reboot
rob@LinELK01:~$ ifconfig
4.) Next lets configure SSH access by first installing OpenSSH Server:
rob@LinELK01:~$ sudo apt-get install openssh-server
5.) Now start SSH and enable it to start with the server:
rob@LinELK01:~$ sudo systemctl start ssh
rob@LinELK01:~$ sudo systemctl enable ssh
6.) Verify SSH is running:
rob@LinELK01:~$ netstat -antp | grep :22
You should see something similar to this in the output:
tcp        0      0 0.0.0.0:22              0.0.0.0:*               LISTEN      -
tcp6       0      0 :::22                   :::*                    LISTEN      -
7.) Finally, run the following commands to update the OS:
rob@LinELK01:~$ sudo apt-get update
rob@LinELK01:~$ sudo apt-get upgrade
rob@LinELK01:~$ sudo apt-get dist-upgrade
And that concludes Pt. 1, we now have a basic Ubuntu 16.04 machine that is ready for the ELK services to be installed.