
In this post and video I give a quick run down of my Home Lab – everything from the rack itself, to the hardware and the basics of what everything is being used for. I started this project towards the end of 2012 with a single Dell PowerEdge 2950 GII and was hoping to teach myself more about web hosting. It has grown quite a bit since then. At this point I have virtualized my firewalls, built many web farms, rolled my own dedicated SAN, built ESXi clusters and so much more. The goal from the beginning was to do everything as cheap as possible, so the majority of the servers and parts were purchased used from ebay.
Servers

All of my servers are currently running VMware ESXi 6.5. For guest OSs I run a mix of Windows, Linux and FreeBSD. As you may have noticed, I tend to like Dell servers as they are hard to beat price wise for the amount of performance you can get plus they have always been super reliable for me.
Here are the specs for each server as the rack currently sits –
4 x Dell CS24-SC
| CPU | 2x Xeon L5420 |
| RAM | 24GB |
| NIC | 4 x 1Gb |
| Disks | Misc SATA |
| iSCSI SAN |
2 x Dell C2100
| CPU | 2x Xeon E5620 |
| 2x Xeon X5650 | |
| RAM | 48GB |
| NIC | 4x 1Gb |
| Disks | Misc SATA |
| Misc SSD |
Lab Totals
| CPU Cores | 52 |
| RAM | 192GB |
| HD Space and I/O | Plenty |
Network

The backbone of my network is powered by a Dell PowerConnect 6248 Switch. I managed to grab it off ebay for around $150 a few years ago, which is still hard to beat today with its 48 Gb ports and Layer 3 capabilities. Color coding on the Cat 6 cables helps separate out the traffic and vlans – Hypervisors, DRACS, Storage and so on.
The Rack
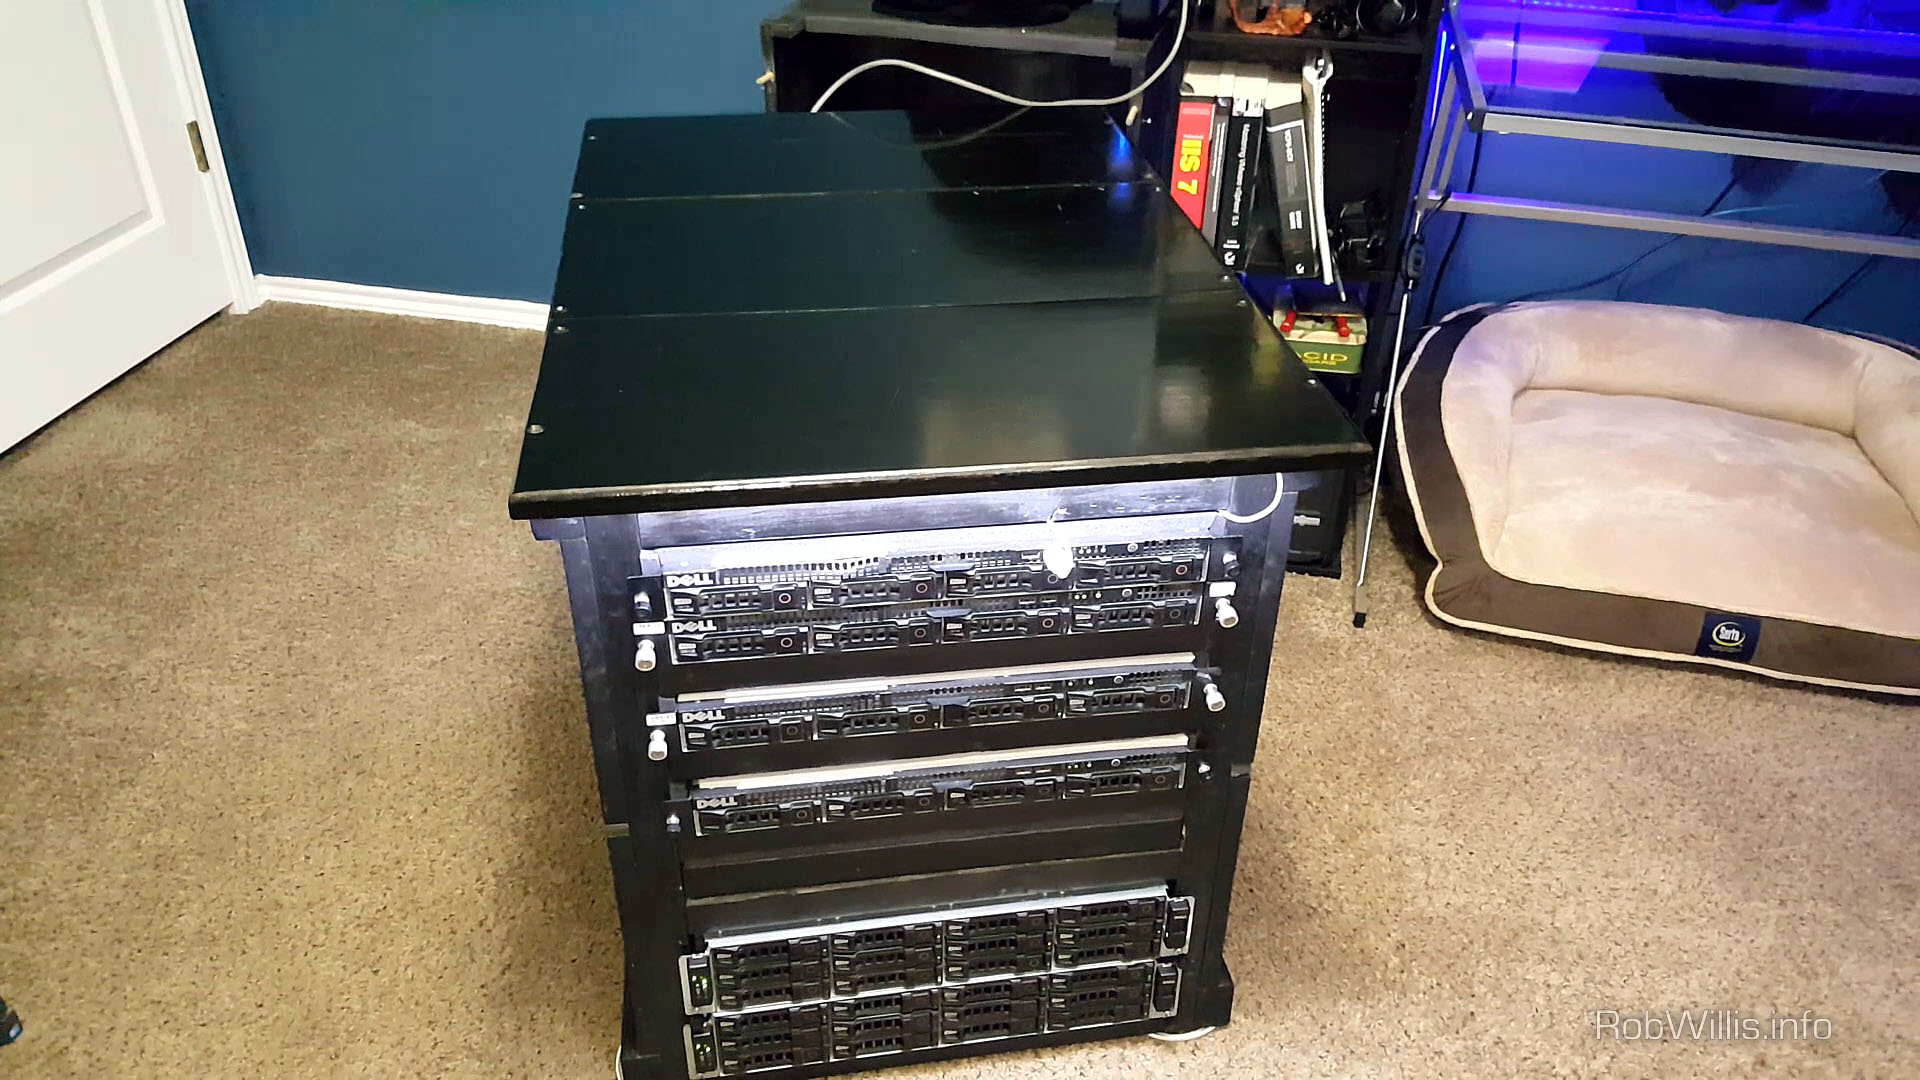
Following the cheap theme, I built my own server rack to the specs I was looking for. I didn’t need a full height rack, and wanted to be able to use it almost like an extension of my desk. The frame is constructed out of 2″ x 3″s and 12″ wide pine boards to cover the sides and top. For the finish I went with an ebony stain and finished the top with a few coats of poly urethane. The end result can hold 3x 1U and 3x 2U servers.
I’ve also built a 12″ deep box to connect on to the back of the rack that has a powered 6″ duct that connects to some 6″ flex pipe which then exits directly out the window through another fan powered duct. Total CFM out is around 500. I’ve also wrapped the piping in a pair of black blankets to help insulate it and keep as much heat out of the room as possible. I have been very pleased with how it has performed so far.
My “SAN”
This one was one of my favorite projects for sure. At work I had the opportunity to “play” around with customers SANS, building out MS SQL clusters and whatever else they needed. For the most part though I really only got to use the end product of the storage, the LUNs were already attached to the servers and I just had to format the drives and build what needed built. SANs are also incredibly expensive so buying a real one wasn’t really on the table. At the same time, I really wanted to be able to dive a bit deeper into shared storage and clustering with both Windows and ESXi.
So what were my options to build out a smallish SAN for as cheap as possible using mostly what I already had? I already had big network switch with plenty of Gb ports available and one of my Dell C2100s has a SAS 6i/R raid controller which is perfect for JBOD (Just a Bunch Of Discs), not to mention that the server also has 12 drive bays. I had also already played around with the idea of virtualizing my own shared storage, in my Using Windows Server 2012 R2 for Shared Storage post.

Naturally taking things to the next level, I planned to build out a dedicated vlan with 2x 1Gb bonded links per server connecting 1x Dell CS2100 server to 3x Dell CS24-SC servers. For drives I picked up 3x Samsung EVO 850 250Gb SSDs and I already had 6x 250Gb SATA 7200 RPM drives. A mix of flash and traditional drives opened the door for storage tiering, keeping frequently accessed files on the flash storage and the less frequently accessed on the slower traditional storage. Now I was going to be hosting mostly VMs on this storage, so how much would tiering really benefit me?
Long story short – I tried out VMware vSAN (with Flash Cache) and Windows Storage Spaces with and without the SSD tiering. In the end, running the SSDs individually (no RAID) and sharing them out via a Windows VM running Storage Spaces was the best solution for my lab. Not using RAID was worth the performance vs redundancy trade off here since this is for a lab and I am ok with losing any machine at any time. If I did in fact end up with a vm I cared about, I could just clone a backup to another drive either locally or on another hypervisor. Eventually I added a 4th SSD for 1Tb of total SSD Storage on my SAN. I have had no problems running 10+ VMs off of this setup with typical lab workloads while still seeing very decent performance.
I honestly liked the VMware vSAN setup the most, with each of the 3 servers having 1x 250Gb SSD and 2x 250Gb 7200 RPM Sata drives configured in a RAID 5 like array across the servers. The down side though was that the trial was only 2 mos and it is very expensive to license but the performance definitely was there. The tiered Storage Spaces on Windows did not work out very well for me, it was just slow. For that setup I ran the drives in RAID 10 with 3x SSDs and 3x 7200RPM Sata drives and I even tried an all SSD RAID 5, but the performance was just not there. Keep in mind, I did have this running on what could probably be considered the most unsupported setup you could have and pairing it with ESXi certainly did not help.
SAN Specs
| Chassis | Dell C2100 |
| RAID Controller | Dell SAS 6i/R |
| Technology | Storage Spaces on Windows Server 2012 R2 (VM) |
| vCPU | 3 |
| RAM | 8Gb |
| Storage | 4x 250Gb SSDs (no RAID) |
| Network | 2x bonded 1 Gb links per host |
That new new…
Now to spice things up and end this post with a bang, I present you with the newest additions…
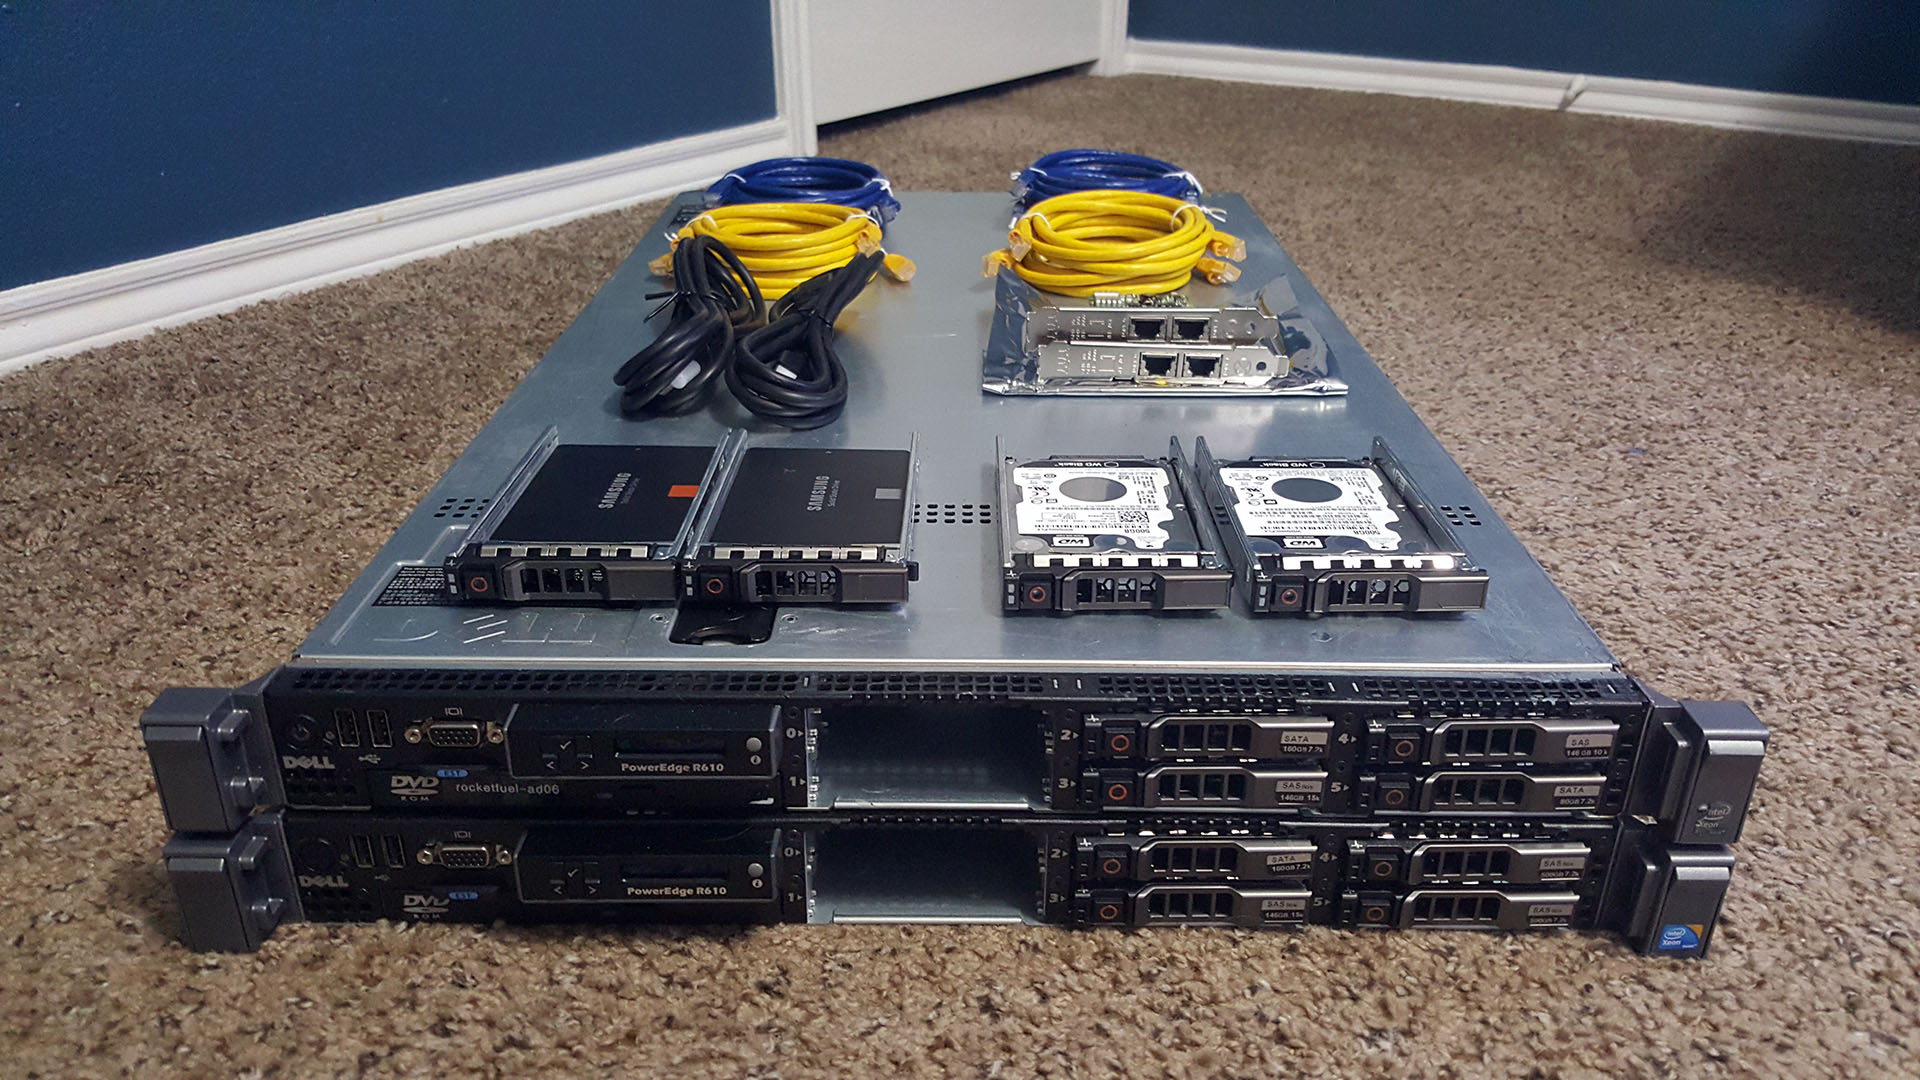
A pair of new to me Dell PowerEdge R610s. I have big plans for these and I am sure there will be more posts to follow… 🙂