
Updating firmwares yet again…
Shortly after the last time I posted on updating firmwares on Dell PowerEdge R610, I found out that Dell dropped support for all 11G servers from the SUU package along with the Lifecycle controller packages which basically broke the entire method I posted. However all hope is not lost, and the newest images are still available for download via the Dell support page. This method is not as streamlined or quick as the SUU or Lifecycle Controller methods, however once you have everything downloaded and the USB drives created, the process is still fairly easy and repeatable.
Getting Started
To get started, the following items will be needed:
- 2 x USB drives (4Gb+)
- Dell R610 Firmwares
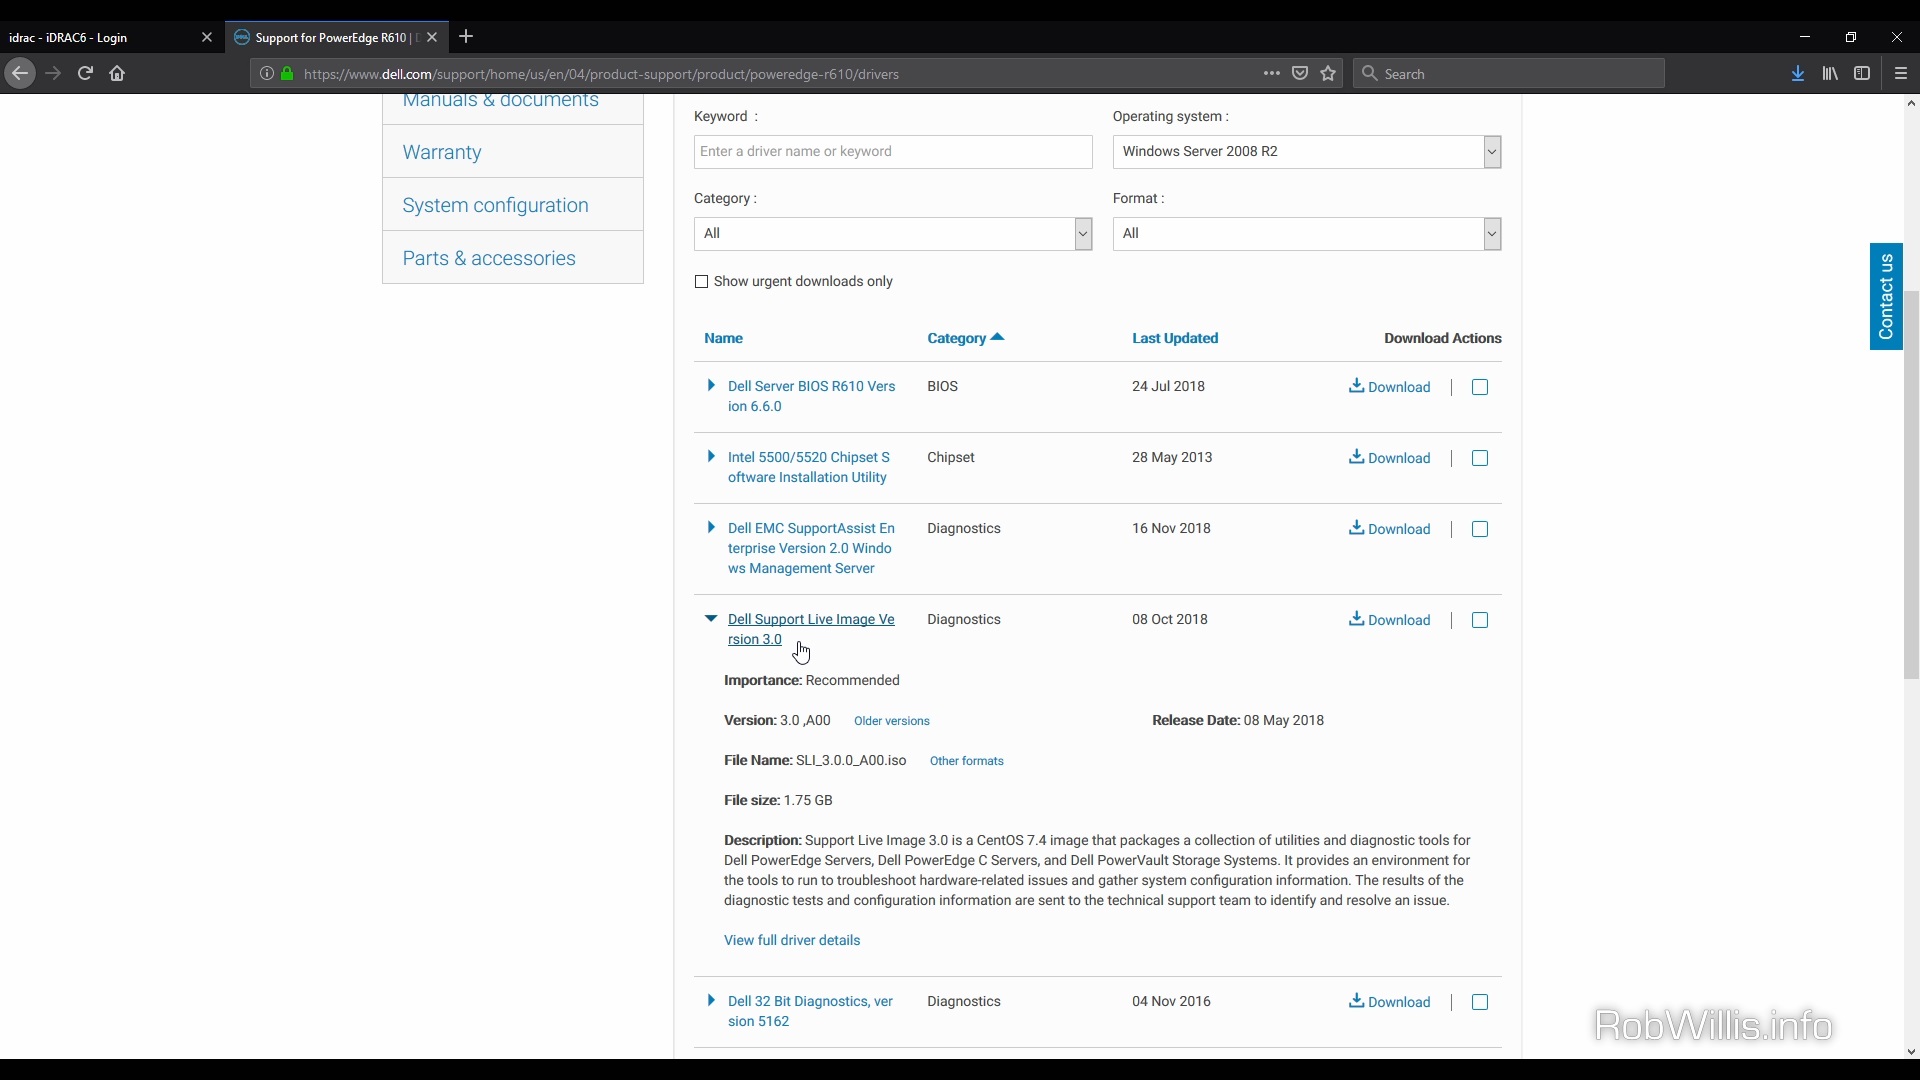
- Dell Support Live iso image
- Rufus for creating the bootable USB drive
For the firmware downloads I would suggest at least doing the BIOS, RAID Controller and DRAC.
I did run into an issue flashing the PERC 6i RAID controller on the R610 chassis when using a linux based OS, but I was able to flash it successfully using a Windows 2008 R2 image and the Windows version of the firmware. I am not going to cover the windows method here since it is pretty self explanitory, but just wanted to mention it in case anyone else ran into the same issue.
Creating the USB Drives
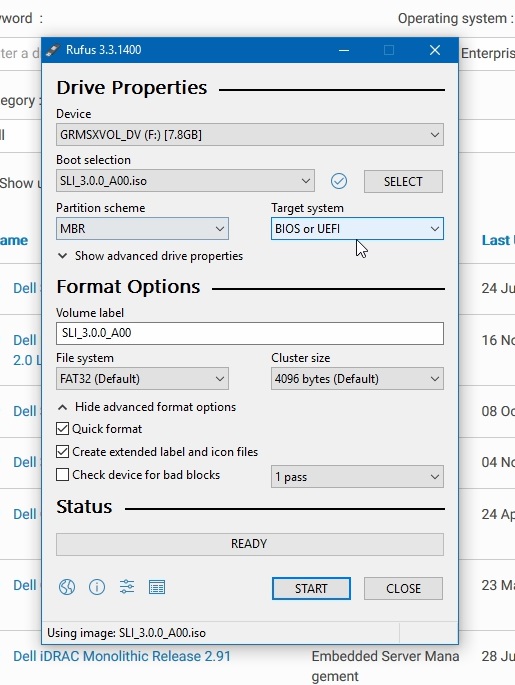
Creating a bootable usb drive from the ISO incredibly easy with Rufus, just follow these steps:
- Download the Support Live ISO Image from Dell
- Download and Open Rufus
- Select the correct USB drive and the Dell ISO Image
- Click create.
That’s it, the usb drive should now contain a bootable support image.
Next copy all of the firmwares that were downloaded previously from the Dell Support site to the other USB drive. There’s nothing really fancy to this part, it is just a simple copy/paste job. You will want to pay attention to the file system format of the USB drive. If it is FAT32 then you shouldn’t run into any issues, but if it is exFAT you will need to load some additional packages on the SLI image. I’ll cover more on exFAT support in a bit.
Booting the Dell Support Image and Adding exFAT Support
-
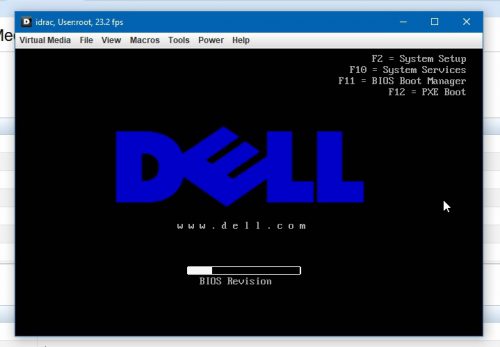
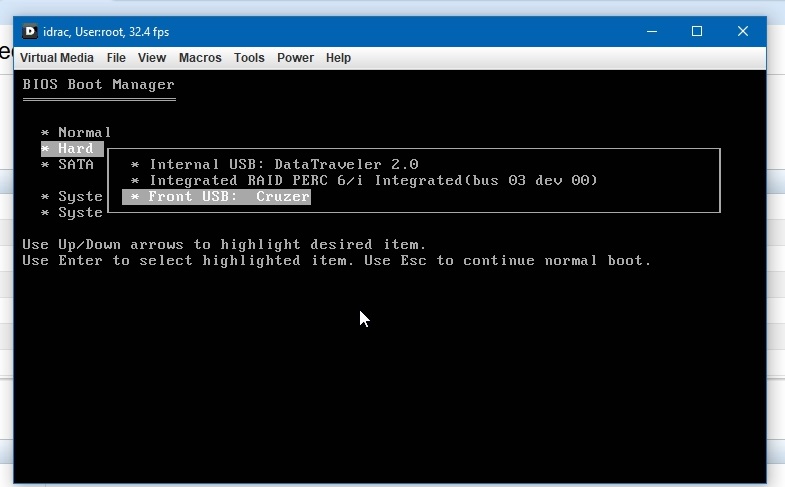
Press F11 to enter the BIOS Boot Manager:
-
Arrow down to the Hard Drive option and then select the correct USB drive from the pop out menu:

-
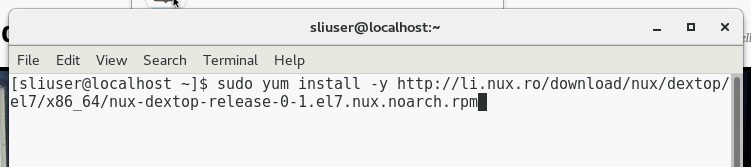
If you are going to be using a larger USB drive formatted with exFAT, you can used these two commands to install the needed packages on the SLI image:

$ sudo yum install -y http://li.nux.ro/download/nux/dextop/el7/x86_64/nux-dextop-release-0-1.el7.nux.noarch.rpm

$ sudo yum install exfat-utils fuse-exfat


Luckily someone else had blogged about the exFAT support on centOS which made that last part easy on me. You can find the original post with the solution here.
Installing the Firmwares
-
Now that the Dell image is ready for the USB drive, insert it into the chassis. Once the drive is detected, use the file browser to locate the USB drive:
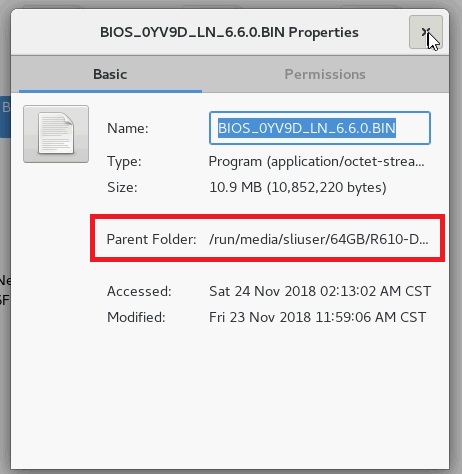
In this case the drive was mounted as /run/media/sliuser/64GB/R610-Drivers, with 64GB being the name of the USB drive and R610-Drivers being a folder on the root of the drive.
-
Next, open a terminal window and change directory to the USB drive:
$ cd /run/media/sliuser/64GB/R610-Drivers/

And then to install one of the firmware files which should be in the .BIN format, just execute it as follows:
$ sudo ./BIOS_0YV9D_LN_6.6.0.BIN
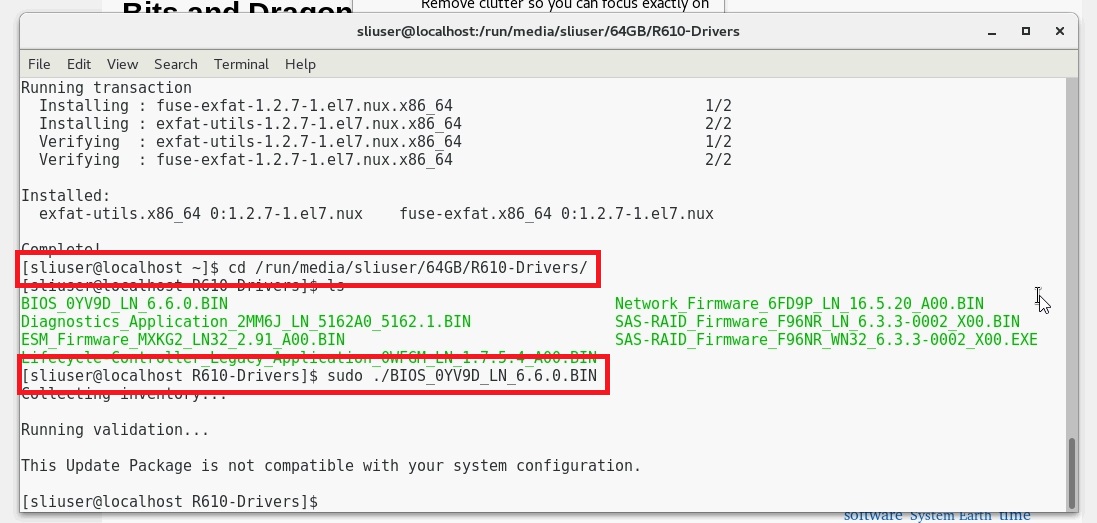
And that’s all it takes! Simply repeat these steps for any additional firmware packages you want to install.
Wrap up
As I mentioned earlier, this process is a little more tedious than the SUU or LifeCycle Controller methods, but when all else fails this is the tried and true method that I use for Dell Servers.
If you have copies of Windows laying around you can also download the Windows versions of the firmwares and flash them that way, the down side there is that the Windows OS will need to be installed first. That is the main reason I prefer to stick to the bootable tools when possible, not to mention that it doesn’t hurt when the tools are free as well.